Did you know that Laravel, a PHP framework with a mere 12% market share, powers some of the world’s most popular websites like Twitch and 9GAG? Let’s dive into how you can harness this powerhouse by deploying Laravel on Ubuntu with Apache.
Prerequisites
Table of Contents
Before we jump in, make sure you’ve got:
- An Ubuntu server (Ubuntu 20.04 or later is ideal)
- SSH access to your server
- A user with sudo superpowers
- A stable internet connection (no dial-up, please!)
- Basic command line know-how
Step 1: Install Required Software
Let’s get your server decked out with the necessary software:
- Update your package list:
sudo apt update - Install Apache:
sudo apt install apache2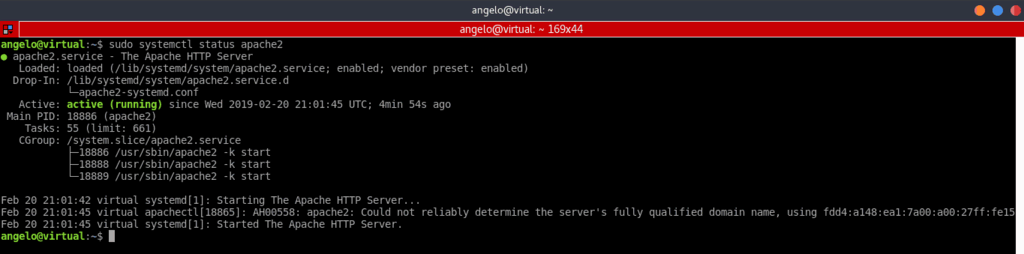
- Set up MySQL:
sudo apt install mysql-server - Get PHP and its sidekicks:
sudo apt install php libapache2-mod-php php-mysql php-curl php-gd php-json php-mbstring php-xml php-zip - Bring in Composer, the PHP dependency wizard:
curl -sS https://getcomposer.org/installer | php sudo mv composer.phar /usr/local/bin/composer - Don’t forget Git:
sudo apt install git
Step 2: Configure MySQL
Time to make MySQL play nice with Laravel:
- Lock down MySQL:
sudo mysql_secure_installation - Create a cozy database for your Laravel app:
sudo mysql -u root -p
CREATE DATABASE laravel_db;
EXIT;
Step 3: Clone or Create Your Laravel Application
Let’s get your Laravel app on the server:
- Head to Apache’s web root:
cd /var/www/html - Clone your existing Laravel treasure trove or start fresh:
# For existing projects: git clone https://github.com/your-username/your-laravel-repo.git # Or for a brand new Laravel adventure: composer create-project --prefer-dist laravel/laravel your-project-name - Step into your project directory:
cd your-project-name
Step 4: Install Dependencies and Set Permissions
- Get those PHP dependencies sorted:
composer install composer dumpautoload - Set permissions so Laravel can do its thing:
sudo chown -R www-data:www-data storage bootstrap/cache
sudo chmod -R 775 storage bootstrap/cache
Step 5: Configure Laravel Environment
- Create your
.envfile:cp .env.example .env - Generate a shiny new app key:
php artisan key:generate - Open up
.envand tweak your database settings:nano .envUpdate these lines with your MySQL info:
DB_DATABASE=laravel_db
DB_USERNAME=your_mysql_username
DB_PASSWORD=your_mysql_password
Step 6: Configure Apache Virtual Host
- Create a new Apache config file for your Laravel app:
sudo nano /etc/apache2/sites-available/laravel.conf - Add this config, swapping
your-domain.comwith your actual domain or server IP:<VirtualHost *:80> ServerName your-domain.com ServerAdmin webmaster@localhost DocumentRoot /var/www/html/your-project-name/public <Directory /var/www/html/your-project-name> AllowOverride All </Directory> ErrorLog ${APACHE_LOG_DIR}/error.log CustomLog ${APACHE_LOG_DIR}/access.log combined </VirtualHost> - Enable your new site:
sudo a2ensite laravel.conf - Show the default Apache site the door:
sudo a2dissite 000-default.conf - Turn on Apache’s rewrite module:
sudo a2enmod rewrite - Restart Apache to make it all stick:
sudo systemctl restart apache2
Step 7: Final Touches and Testing
- Optimize Laravel for prime time:
php artisan config:cache php artisan route:cache php artisan view:cache - One last permissions check:
sudo chown -R www-data:www-data /var/www/html/your-project-name sudo find /var/www/html/your-project-name -type f -exec chmod 644 {} \; sudo find /var/www/html/your-project-name -type d -exec chmod 755 {} \; - Fire up your browser and visit your domain or server IP to see your Laravel masterpiece in action.
Also Read: How To Install LAMP On Ubuntu 16.04 With A Single Command
Troubleshooting Common Issues
Hit a snag? Don’t sweat it. Here are some common hiccups and how to fix them:
- HTTP ERROR 500: Usually a permissions problem. Double-check those permissions from Step 4 and Step 7.
- “No input file specified” error: Make sure your Apache config is pointing to the right spot – the
publicdirectory of your Laravel app. - Database connection woes: Triple-check your
.envfile for correct database credentials and ensure MySQL is up and running. - Blank page or PHP errors: Take a peek at the Apache error logs (
/var/log/apache2/error.log) for clues and tackle them one by one.
Following this guide should have your Laravel app up and running on Ubuntu with Apache faster than you can say “Artisan command”. Remember to keep your server and Laravel app updated to stay ahead of the game.
For more in-depth information on running Laravel locally on Ubuntu, check out this guide on running Laravel locally on Ubuntu using Apache virtual host. If you’re looking to deploy your Laravel app on a production server, this StackOverflow thread offers some great insights.
Want to dive deeper into Laravel deployment? This comprehensive guide covers everything from prerequisites to troubleshooting. And if you’re hungry for more Ubuntu-specific deployment tips, this detailed tutorial has got you covered.
Now go forth and Laravel like a pro!